Teriyaki Chicken Wrap


 photo DSC_0125_zps9c575cf7.jpg

This was a little lunch time experiment.  A successful one.  We are going to have this for dinner tonight since I am the only one who ate it for lunch today and it is delicious!!

Rice, cooked.  (I used sushi rice, but you can use whatever kind you like.)
Soy sauce ... I added a few drops to the rice.
Avocado, sliced
Spring onion, thinly sliced
Lettuce, shredded
Sesame seeds
Japanese mayo
Flour tortillas

Just heat your tortillas.  Fill with rice, chicken, avocado, spring onions and lettuce.  Top off with a sprinkle of sesame seeds and a drizzle of japanese mayo.  I didn't try it this time, but I imagine my husband and son will add sweet chilli sauce to theirs tonight ...

Done. 

PS. If you plan this for the night after you make Easy Crock Pot Teriyaki Chicken, you will have a super simple dish.  Minimal prep work.  Minimal clean up.  Maximum taste and enjoyment!

Easy Crock Pot Teriyaki Chicken


Pinterest is my major source of recipe finding these days.  
I love it.  This one has been a hit.  I made it last week and then again this week.  
It makes a heap ... actually, mine makes more because I added an extra chicken breast.  
I'm going to freeze a bunch of it this week!! I think it will reheat just fine.

 photo DSC_0121_zps6c74acbb.jpg 

 I didn't make many changes ... mainly just adding the extra chicken breast.

1/2 cup teriyaki sauce 
1 chicken stock cube & 1/2 cup water  (you could also use 1/2 cup chicken stock but I never have it on hand ... I need to make and freeze some so I do!!)
1/3 cup brown sugar, packed 
1/4 cup soy sauce 
4 cloves garlic, minced 
1 teaspoon sesame oil 
4 chicken breasts, skinned and boned
1 spring onion, thinly sliced 
sesame seeds
Mix first 6 ingredients in a bowl.  Place chicken breasts in the crock pot and pour teriyaki mixture and spoon some of the mixture on top of the breasts if they are not covered.  Put the lid on and cook for 3.5 hours on low.  Turn crock pot to 'keep warm' setting. Shred chicken in pot with juices.  Leave until ready to serve. 

The first night, I served this on rice with the spring onions and sesame seeds on top. 

The second night, I served in a tortilla ... that recipe is coming next!

Talia's Korean Bulgogi

 photo 2F4A6587-ACE0-430E-A03F-C0BD36473AB0-1877-0000038988F35531_zpsf70c4c00.jpg 

It is delicious.

 But more than that, this recipe is easy to double for another night.
I've been trying to find meals that I can prepare extra to freeze for another time.
My goal is to have a freezer full of cooked, or prepared and ready to cook food for times 
that are exceptionally busy, or I've not been able to organize a meal.   Those are the nights we 
eat two minute noodles or something similarly unhealthy.  This should solve that problem! As well,
I prepared this last night and put it in the fridge ... this afternoon, after we got home late from soccer, I pulled out the bag ready to cook.  I had put the rice in the rice cooker before we left so that was 
ready.  Dinner was on in no time.  AND ... it get's even better.  Rory had to work late but the 
kids were starving so I cooked theirs and ours is actually still waiting in the fridge.  He is
home now but changing my head light.  Seriously, it never stops around here! :)  

Here is the doubled recipe - with the intention of freezing half.


6 tablespoons soy sauce
2 tablespoon sesame oil
2 tablespoons sesame seeds
4 cloves garlic, minced
2 teaspoons white sugar
1 teaspoon salt
1 teaspoon pepper
1 kg beef, thinly sliced
2 carrots, grated
2 spring onions, sliced
1 onion, finely sliced

Mix first  seven ingredients in a large ziplock bag.  Add beef, carrots, spring onions and onion.  Seal bag and shake it around to coat beef.  Refrigerate for a few hours.  I did mine over night.

When ready to cook, just cook 1/2 of the ingredients in the bag, label the bag and freeze the other 1/2 for another time!

Preheat a wok to high heat.  Stir fry beef and veggies in small batches.  Talia's recipe said until you get crispy bits.  Mine never went crispy but I don't think my beef was as thin as hers ... No matter though, it was still delicious!


Asian Ginger Sesame Chicken Salad


 photo 4989E3C8-9748-422B-903F-A2A1A9FEEDB6-1183-0000023AE003E457_zpsf0e13021.jpg

I found this recipe, originally from Curtis Stone in Redbook and just had to try it.
I made a couple of small changes ... 

This first bit is the ingredients for the dressing.  You'll use a little bit of it for the marinade as well.
 

1/4 cup soy sauce
fresh ginger, finely grated (recipe called for a 3 inch piece, I reckon I used a 1 inch piece) 
1/4 cup canola oil 
2 Tbsp hoisin sauce 
1 Tbsp sesame oil 
1 tsp sriracha sauce 
1 tsp kosher salt 
2 large chicken breasts, boneless and skinless 
1/4 cup red wine vinegar 
1/4 cup finely chopped spring onions 

These ingredients are for the salad part of it.  

1/4 to 1/2 a Wombok (Chinese cabbage), very thinly sliced 
2 carrots, grated  
3 spring onions, thinly sliced 
fresh coriander, coarsely chopped (I  just threw in a bunch, it's really to taste) 
1/2 cup slivered almonds 
(I was in a hurry and just threw all nuts & seeds in straight out of freezer) 
a small handful of white sesame seeds 
a small handful black sesame seeds

In a bowl, whisk together first seven ingredients.

Put the chicken into a large ziplock bag and spoon in 4 tablespoons of the dressing.  Zip the bag, removing air as you go.  Rub the marinade all over the chicken, then pound it to get the chicken all the same thickness.  Marinate the chicken for at least 30 minutes.

With the remaining dressing in the bowl, add the red wine vinegar and spring onions.  Set aside.  This is your dressing.

Grill the chicken.  Rory did ours on the BBQ but you could do it inside ... just get it cooked.  The original recipe said to let it rest 15 minutes ... oops, didn't read that bit.  We probably only let it rest 5 minutes.  It was delicious.

Let it rest if you like ... then cut it into slices, chunks, whatever you prefer. 

Add salad ingredients to large bowl.  Add chicken.  Mix.  

We used the dressing to top individual salads as we served so that the leftovers wouldn't be soggy the next day ... 


fancy egg sandwiches

 photo A838ED96-6DA9-41AD-A0FC-8A3AE53F968A-5018-00000589472021DB_zpsa4f6c669.jpg 

my word, these are good! 
we had them for dinner, not breakfast.  i love breakfast for dinner!
i saw the recipe on pinterest and there was no question in my mind that they would be good.
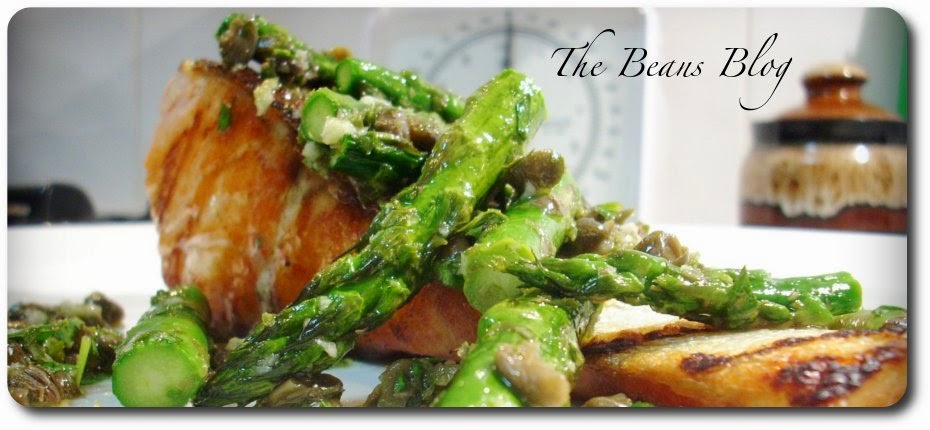
i took a few short cuts and didn't really use the same measurements.
oh and the grocery store substituted bake at home rolls for the 
ciabatta i ordered but they were delicious! and i used
a different cheese.  two cheeses actually.
i used more garlic.  i forgot
the parsley.
 

bag of baby spinach, 160g
mozarella and gruyere cheese, 200g total
8 eggs
2 tablespoons thickened cream
salt and pepper
2 tablespoons butter
3 cloves garlic, minced
1/3 cup panko bread crumbs
8 bread rolls, i used bake at home ones

preheat oven to 400F/200C.

ppray a 9x13 baking dish with oil.  

cover the bottom of the baking dish with the spinach.  grate both cheeses over the spinach (only about 1/2 the cheese at this point).  crack the eggs over the top of the cheese, spacing them out evenly.  salt and pepper next.  then drizzle the cream.  grate the rest of the cheese.  bake 15-25 minutes til yokes are as runny or not runny as you like them. 

while the eggs are in the oven, melt the butter in a small sauce pan over a medium heat.  whisk constantly.  the butter will start to brown.  don't let it go too brown, or black ... that is burned.  (ask me how i know) the good news is that if you burn it, you have time to start over.  (again, ask me how i know!) the butter will be pretty hot at this point, turn off the heat and throw in the minced garlic.  keep stirring!  let the garlic brown a little bit and then stir in the panko into this garlicy buttery deliciousness.  

if you are using bake at home bread rolls, throw them in the oven according to the instructions on the pack.  mine took like 6 minutes.  

once the eggs are just about done, spoon the breadcrumb mixture over the top and pop back in the oven for a couple minutes.  they will crisp up a little bit.

cut the finished product into eight 'rectangles' and scoop one onto each bun.  

delicious!


Easy Crock Pot Venison Stew

There are many yummy sounding recipes for venison stew involving various marinades, wines, spices, etc...but when you're fiance calls from the grocery store while you're in the middle of crazy work week and asks for ingredients that will make a quick stew that he can throw into the crock pot - you make something up and cross your fingers that it's edible.  Thankfully, this stab in the dark turned out delish! 

Easy Crock Pot Venison Stew


- One ziplock full of venison (in other words, I have no idea how much meat there was but use enough to feed your family and balance out the veggies) ... Prep:  I can't remember where I read it, but for SUPER tender (and not at all gamey) venison - defrost in fridge for a few days and when it's thawed, sprinkle with salt and soak in ice water and ~1 cup white vinegar for about an hour.  Rinse and either cook it immediately or refrigerate for one day or less (needs to be used pretty quickly after it's thawed)

- Peel and chop enough carrots and potatoes to even out your meat. 

- chop one onion (not sure whether Glenn added garlic or not...but a little or a lot of garlic never hurts!)

- 1 large can cream of mushroom soup

- 1 packet of ranch dressing mix

- 2 cans chopped tomatoes

Dump everything into the crock pot.  Cook on low for 10 hours (I think ours actually cooked for more like 12 or 14...so extra doesn't hurt it!).  Glenn forgot to add the tomatoes in the morning, so they ended up getting added a couple hours before we ate.  Either way is probably fine. 

Nothing fancy...but yummy and great on a cold rainy fall day after football games and parent teacher conferences!